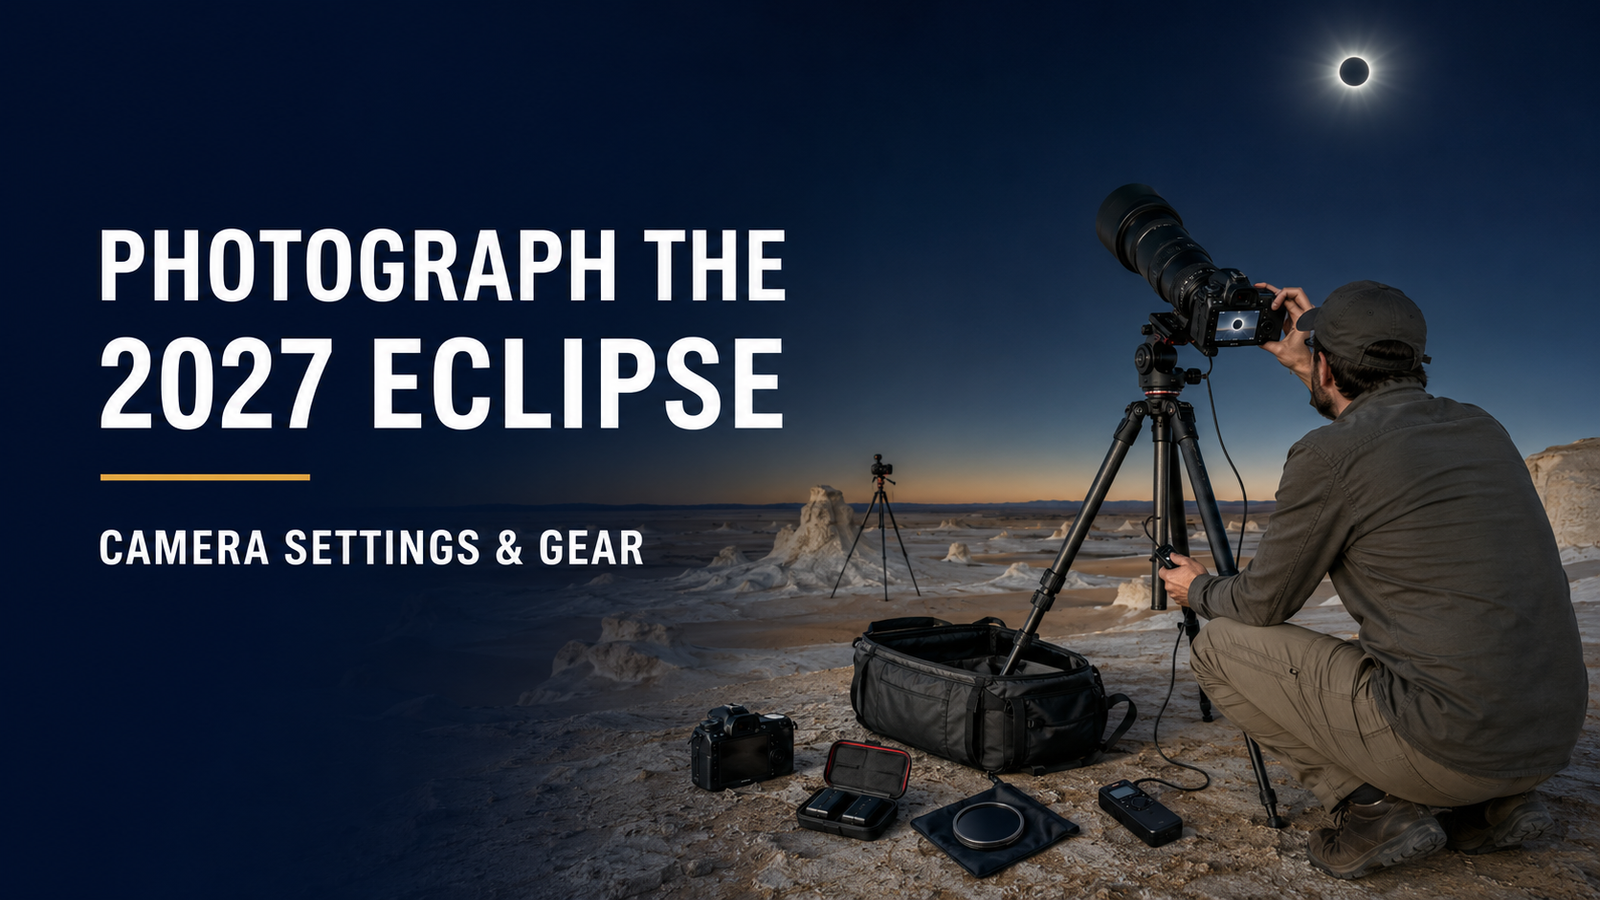
photograph total solar eclipse 2027: quick answer
photograph total solar eclipse 2027: If you are planning to photograph the 2027 total solar eclipse, Egypt gives you an unusually generous amount of totality — but that does not make eclipse photography easy. The most important work happens before August 2, 2027: choosing a safe solar
If you are planning to photograph the 2027 total solar eclipse, Egypt gives you an unusually generous amount of totality — but that does not make eclipse photography easy. The most important work happens before August 2, 2027: choosing a safe solar filter, simplifying your camera workflow, practicing on the uneclipsed Sun, rehearsing filter removal and replacement, and deciding how much of totality you are willing to spend looking at a screen instead of the sky.
For photographers traveling to Egypt, there is another layer of planning. The eclipse occurs around midday, the Sun will be very high in the sky from many Egyptian viewing locations, and August heat can affect the photographer, batteries, electronics and the pace of setup. A reliable viewing field therefore needs open sky, room for tripods, shade nearby, drinking water, cooling and enough time to set up without rushing.
This guide explains how to photograph the August 2, 2027 total solar eclipse in Egypt with a DSLR, mirrorless camera, telephoto lens, wide-angle camera or smartphone. It also explains the safety rules that matter more than any exposure setting.
First Rule: Protect Your Eyes and Your Camera
No photograph is worth an eye injury or damaged equipment.
During the partial phases of a solar eclipse, the visible surface of the Sun remains intensely bright. The fact that the Sun looks like a crescent does not make the remaining photosphere safe to view with the naked eye or through unfiltered optics.
The American Astronomical Society states that cameras, binoculars and telescopes require a solar filter securely mounted over the front opening of the optics during the partial phases. The filter belongs in front of the lens, where it intercepts sunlight before the lens concentrates it.
Do not put ordinary eclipse glasses over your eyes and then look through an unfiltered telephoto lens, optical viewfinder, binocular or telescope. Magnifying optics concentrate sunlight and can overwhelm the viewer.
Likewise, a normal photographic neutral-density filter is not automatically a solar filter. Do not improvise from an ND filter, stacked sunglasses, smoked glass or dark plastic. Use a purpose-made solar filter from a knowledgeable, reputable supplier and follow the manufacturer’s instructions.
For direct eye viewing, read the separate safe eclipse glasses ISO 12312-2 guide. Camera-lens solar filters are a different product category.
When Can the Camera Solar Filter Come Off?
Only during the total phase of a total solar eclipse, when the Moon completely covers the Sun’s bright photosphere.
That rule applies only if your exact position is inside the path of totality.
Before second contact, the camera filter stays on.
During true totality, the camera filter comes off because the corona is much fainter. If you leave the filter attached, your totality frames may be nearly or completely black.
As totality ends at third contact and the bright photosphere begins returning, the filter must go back on.
This is why filter design matters. A filter that takes a minute to unscrew is a poor choice for a photographer who needs a clean transition into and out of totality. The AAS specifically notes that a front filter should be secure enough that wind cannot remove it, but practical to remove and replace at totality.
Your rehearsal should include this physical motion.
Do not wait until eclipse day to discover that the filter jams, changes focus when removed, touches the lens hood, falls loose, or cannot be replaced quickly.
Understand the Four Contacts Before You Touch the Camera
A total solar eclipse is easier to photograph when you think of it as a sequence.
First contact (C1) is when the Moon first begins to cover the Sun. From then until totality, you are photographing a partial eclipse through a solar filter.
Second contact (C2) marks the beginning of totality. The final bright photosphere disappears. Around this transition you may see Baily’s beads and the diamond-ring effect.
Totality is the interval between C2 and C3. The corona appears, the sky darkens and the solar filter is removed from the camera.
Third contact (C3) is the end of totality. Bright sunlight returns. The solar filter must be restored.
Fourth contact (C4) is when the Moon completely leaves the solar disk and the eclipse ends.
The exact local contact times depend on your coordinates. Do not use a generic “Luxor time” if you are actually photographing from a different field. Review the 2027 eclipse times in Egypt by city as orientation, then obtain a coordinate-specific calculation for your final observation site.
What Camera Do You Need?
You do not need the most expensive camera available.
A camera with manual exposure control, reliable RAW capture, a lens you understand and controls you can operate without thinking is more useful than a new flagship body you first use on eclipse morning.
Good options include:
- Mirrorless interchangeable-lens cameras.
- DSLR cameras.
- Bridge cameras with long optical zoom, if they accept a safe front solar filter.
- Smartphones for wide scenes, reactions, video and modest eclipse images.
- A second fixed wide-angle camera for the landscape while your main camera handles the close-up.
Full-frame, APS-C and Micro Four Thirds systems can all produce excellent results. Sensor size affects field of view and noise performance, but familiarity matters more.
If you already own a camera that you can confidently operate in manual mode, there is usually more value in practicing with it than changing systems shortly before the event.
Choosing a Lens: How Large Should the Eclipse Be?
Your lens choice should match the photograph you want.
14–35mm: The Environment
A wide-angle lens is excellent for showing the darkened landscape, the observing group, desert horizon and the eclipse high in the sky.
In Egypt this can be especially powerful because the 2027 Sun will be high. A wide composition can include people, tents, tripods, desert and sky without forcing the Sun to dominate the frame.
The Sun itself will appear small, but the photograph can tell the story of the event.
50–200mm: Context With a Larger Sun
This range lets you combine the eclipse with landscape features while making the Sun more visible.
It can work for sequences that show multiple eclipse phases across one frame, but planning the solar path becomes important.
300–600mm: Strong Close-Up
This is the most useful general range for photographers who want the eclipsed Sun and corona to dominate the image.
A 400mm to 600mm lens can produce a satisfying solar disk size while leaving room for the corona.
On APS-C and Micro Four Thirds cameras, the narrower field of view means the Sun will occupy more of the frame for the same focal length.
800mm and Beyond: Specialized
Longer systems can capture more detail but become less forgiving.
Tracking, vibration, focus, framing, wind and the Sun’s movement across the frame become more important. Extremely long focal lengths can also crop the outer corona, which is often the most visually dramatic part of totality.
A first-time eclipse photographer should not assume that more focal length automatically means a better photograph.
How High Will the Sun Be in Egypt?
Very high.
Near the central Egyptian section of the eclipse path, the Sun is high in the midday sky. Around Luxor, for example, the maximum eclipse occurs with the Sun roughly above 80 degrees altitude.
That changes the mechanics of photography.
A tripod head that feels comfortable when aimed 30 degrees above the horizon may become awkward when pointed almost straight upward.
Before traveling, test your setup on a high Sun around local noon.
Check:
- Can your tripod head point high enough without the camera hitting the legs?
- Can you see the rear screen?
- Can you reach the filter?
- Does the lens collar rotate into a comfortable position?
- Does your cable release pull against the camera?
- Does a battery grip make the system collide with the tripod?
- Can your tracker handle the geometry?
- Is the camera balanced at the required elevation?
Do not discover these problems at C2.
The Solar Filter: Buy It Early and Practice With It
A solar filter for a camera lens should cover the front aperture securely.
Common filter materials can produce different colors. Some render the Sun white, while others show it yellow or orange. The color is less important than verified safe performance, physical condition and secure mounting.
Inspect the filter before every practice session and again on eclipse morning.
Do not use it if the material is punctured, torn, deeply scratched, detached from its holder or otherwise compromised.
Make sure the filter cannot blow off in a gust.
At the same time, you need a removal method you can perform rapidly without disturbing framing or focus.
A practical solution might be a properly engineered slip-on or magnetic system designed for solar use. The exact product depends on your lens diameter and supplier.
Do not create a dangerous homemade mount that leaves gaps around the lens.
Never Put the Solar Filter Behind the Lens
The Sun’s concentrated energy becomes much more dangerous after passing through the objective.
Solar filters belong over the front aperture.
A filter placed behind a telescope or at an eyepiece can be exposed to concentrated heat and may fail.
The same principle is why you should not rely on eye-worn eclipse glasses while looking through unfiltered magnifying optics.
Front-filter first.
Tripod or Tracker?
A tripod is strongly recommended for telephoto eclipse photography.
It reduces framing errors, allows slower exposures during totality, keeps your hands free for filter changes and makes bracketing more consistent.
A motorized tracking mount can keep the Sun centered for longer and permit longer corona exposures, but it adds setup complexity.
For the August 2027 eclipse, ask yourself a simple question:
Will the tracker make my workflow easier because I already know it, or harder because I am still learning it?
If you regularly use an equatorial or solar-tracking mount, it can be excellent.
If you have never aligned one in a remote field, a sturdy tripod with occasional reframing may be safer operationally.
The eclipse is not the time to troubleshoot a new mount.
Manual Focus Is the Safer Plan
Do not depend on autofocus at the most important moment.
With the solar filter installed, focus on the solar limb or visible sunspots. Magnify live view if your camera allows it.
Take several test images and inspect them at high magnification.
When focus is correct:
- switch to manual focus;
- avoid touching the focus ring;
- consider using a small piece of removable tape to secure the ring;
- if using a zoom, secure the selected focal length as well.
Heat can shift focus slightly, especially with long lenses, so check it periodically before the final sequence.
Do not wait until totality to make your first focus test.
RAW or JPEG?
Use RAW if your camera and workflow support it.
The corona spans a huge brightness range. RAW files preserve more tonal information for later processing and give you greater flexibility with white balance, highlights and shadow recovery.
If your camera writes RAW slowly and fills its buffer during bursts, test that behavior before eclipse day.
Some photographers choose RAW plus JPEG for fast previews. Others choose RAW only to maximize buffer depth.
The correct answer depends on the camera.
What matters is knowing how many frames your camera can shoot before slowing down.
A Practical Exposure Strategy
There is no universal “perfect setting” for a total solar eclipse.
Solar filters vary in transmission. Cameras vary in sensitivity. Lenses vary in actual aperture. Atmospheric transparency varies. The corona itself varies.
That is why authoritative eclipse-photography guidance emphasizes testing and bracketing rather than one magic shutter speed.
The AAS recommends keeping ISO and aperture relatively stable and varying shutter speed, especially around the fast transitions into and out of totality.
For the filtered partial Sun, a common test starting point is around ISO 100–200, f/8 and short shutter speeds in the neighborhood of 1/500 to 1/4000 second. You must test your actual filter and camera.
For totality, many photographers use a higher ISO and/or wider aperture, then run through a broad shutter-speed sequence to capture everything from the bright inner corona and prominences to the faint outer corona.
The AAS notes that very short exposures around 1/1000 second or faster record the bright inner structures, while much longer exposures — around 1/10 second or longer when stability permits — can reveal fainter outer corona.
Treat those numbers as a starting framework, not a prescription.
| Phase | Filter | Starting Approach | Main Goal |
|---|---|---|---|
| Partial phases | Solar filter ON | Test around ISO 100–200, f/8, 1/500–1/4000s | Sharp solar crescent |
| C2 / diamond ring | Transition only when totality truly begins | Preset burst/bracket sequence | Diamond ring, Baily's beads |
| Totality | OFF | Bracket from very short to longer exposures | Prominences, inner and outer corona |
| C3 / return of Sun | Replace immediately as bright photosphere returns | Reverse the prepared contact sequence | Beads / diamond ring safely |
| Final partial phase | Solar filter ON | Return to tested partial settings | Closing sequence |
The table is deliberately a starting framework. Your practice sessions determine the settings you actually use.
Why Bracketing Matters During Totality
The corona is not a uniformly bright object.
The inner corona close to the lunar limb is much brighter than the faint streamers extending outward.
One exposure cannot capture the entire range cleanly.
A short exposure may show the chromosphere, prominences, Baily’s beads and inner corona. A medium exposure may reveal more of the structured corona. A longer exposure can reach farther into faint streamers but may overexpose the inner region.
This is why eclipse photographers often create a sequence of exposures and combine selected frames later.
The goal on eclipse day is not to produce the finished HDR corona in-camera. The goal is to collect a clean set of well-focused, well-framed exposures across a useful range.
Build One Exposure Sequence You Can Execute Without Thinking
Complexity is the enemy of totality.
You might have more than six minutes at a strong Egyptian location, but those minutes still disappear astonishingly quickly.
Create one repeatable sequence:
- Filtered partial phase settings.
- Final focus and framing check.
- Confirm battery and memory.
- Move to your planned C2 shutter speed.
- At true totality, remove the front solar filter.
- Capture a fast bracket for the contact phenomena.
- Pause and look at the eclipse.
- Run one or two corona brackets from short to long.
- Pause again and experience the scene.
- Prepare for C3.
- Capture the ending contact sequence.
- Restore the solar filter as bright photosphere returns.
- Confirm the filter is secure before continuing partial-phase photography.
Practice this aloud.
Use a timer or contact-call app if you trust it, but know the sequence independently.
Do Not Spend Six Minutes Looking at the Rear Screen
This deserves its own rule.
A technically perfect photograph is not a substitute for seeing totality.
The AAS notes that experienced eclipse chasers often advise first-time observers to keep photography simple.
That advice is especially relevant in 2027 because Egypt can provide such a long total phase. The extra time should make the experience less frantic, not encourage a six-minute menu-navigation session.
Once your sequence is working, stop touching the camera.
Look up.
Watch the corona directly with unaided eyes during totality.
Notice the dark sky, horizon glow, temperature change, people around you and the scale of the lunar shadow.
Your camera can record frames. It cannot replace that memory.
Photographing Baily’s Beads and the Diamond Ring
These effects occur around the beginning and end of totality.
Baily’s beads are created when tiny points of photospheric light shine through valleys along the Moon’s irregular edge.
The diamond-ring appearance happens as a brilliant point of sunlight remains beside the emerging corona.
These moments are brief and extremely bright compared with the corona.
The challenge is that they occur while you are also handling the solar filter transition.
Do not improvise the sequence. Know your local C2 and C3 times, have the camera already focused and framed, and use continuous shooting or a prepared bracket if appropriate for your camera.
Most importantly, keep your eye-safety procedure conservative. If you are unsure whether totality has begun, keep your visual eye protection on. Camera and human viewing rules should never be confused in the rush of the contact.
Photographing the Corona
The corona is the main target for most close-up eclipse photographers.
It can extend several solar radii from the black lunar disk, so leave room in your frame.
A lens that frames the photosphere beautifully during the partial phase may feel too tight during totality.
Practice composition using the uneclipsed Sun but mentally reserve additional space around it for the corona.
The exact corona shape changes with solar magnetic activity. You cannot know the final appearance perfectly in advance.
That uncertainty is part of the event.
Photographing Prominences
Prominences can appear as bright pink-red features around the edge of the Moon during totality.
They are much brighter than the faint outer corona.
Shorter exposures help preserve their color and shape.
This is another reason to bracket broadly rather than optimize everything for one corona exposure.
A Wide-Angle Second Camera May Give You the Most Personal Picture
If you have a second camera, consider making it simple.
Set a wide-angle body on a tripod facing your group and the sky.
Start video or an interval sequence before totality, then leave it alone.
A wide camera can record the rapid darkening, the horizon glow, observers pointing upward, your own reaction and the returning sunlight.
Technically, this image may be less impressive than a 600mm corona composite.
Emotionally, it may be the photograph you value most.
Smartphone Eclipse Photography
A smartphone is excellent for documenting the experience, but it should not be treated as a miniature solar telescope.
During partial phases, use a safe filter designed for the phone camera if you point the camera at the Sun.
Do not hold eclipse glasses loosely over the phone lens and assume the setup is mechanically secure.
AAS guidance lists purpose-built smartphone solar-filter products and emphasizes safe filtration for partial-phase imaging.
For totality, the Sun is much dimmer and the filter is removed.
Smartphones may struggle with the enormous brightness range of the corona, but modern HDR and computational photography can still produce attractive images.
The most reliable smartphone strategy for a first eclipse may be video.
Place the phone on a tripod or stable support. Frame your observing group and the sky. Start recording before totality and leave it running.
You may capture the changing light, audio, cheers and reactions without sacrificing your own view.
Optical Viewfinders Need Special Attention
With a DSLR, never look through an optical viewfinder toward the partial Sun unless a proper solar filter is securely mounted over the front of the lens.
An unfiltered telephoto lens can concentrate dangerous sunlight into the viewing system.
Mirrorless cameras display an electronic image, which reduces direct optical exposure to the eye, but the camera itself still requires the correct front solar filter during partial phases.
Do not interpret an electronic viewfinder as permission to point unfiltered optics at the Sun.
Heat Management for Photographers in Egypt
Photography creates extra heat exposure because photographers tend to stay in one place beside equipment for longer than other guests.
They arrive earlier. They carry heavier bags. They kneel or stand in direct sunlight. They forget to drink while troubleshooting. They resist leaving the tripod because they fear losing framing.
That behavior is a poor match for August desert conditions.
Read the full Egypt August desert heat safety guide before planning the event.
At the viewing field:
- set up early enough that you are not rushing;
- use shade while waiting;
- keep drinking water accessible;
- wear suitable clothing and a sun hat;
- apply sunscreen;
- avoid repeatedly carrying heavy gear in midday heat;
- return to a cooled rest area after setup;
- use a buddy system;
- tell staff if you feel dizzy, weak, confused or unusually unwell.
The camera can remain on the tripod while you recover in shade nearby.
You do not need to stare at it continuously for two hours.
Batteries, Heat and Power
High temperatures can affect battery performance and electronics.
Carry more charged batteries than you expect to need. Store spares out of direct sunlight. Do not leave batteries, cameras or power banks baking on a vehicle dashboard.
If the camp provides charging, use it before eclipse morning rather than relying on last-minute access.
A practical photography kit may include a fully charged primary battery, two or more charged spares, camera charger, power bank where compatible, cable release or intervalometer batteries, tracker batteries, spare phone power and labeled charging cables.
If your entire imaging plan depends on one unusual battery, bring redundancy.
Memory Cards and File Management
Use trusted cards.
Format them in-camera after backing up anything important. Avoid arriving with a nearly full card.
High-speed bursts and RAW bracketing can consume space quickly.
Before the eclipse, test how many bracket sequences your card and camera buffer can sustain.
If you use two card slots, decide in advance whether you want backup mirroring or overflow.
Do not waste totality changing cards.
Dust and Wind in a Desert Viewing Field
Low cloud cover does not mean zero environmental challenges.
A desert field can have wind and dust.
Bring a blower, microfiber cloths, sealed bags, lens caps, a simple camera cover, tape and safe tripod ballast if appropriate.
Avoid changing lenses unnecessarily in blowing dust.
If you use a front solar filter, check that wind cannot lift it.
Do not hang a heavy bag from a tripod in a way that turns it into a swinging pendulum.
The goal is stability, not extra movement.
Why a Managed Western Desert Viewing Field Works Well for Photographers
A dedicated field can solve several practical photography problems at once.
The confirmed Western Desert eclipse-camp region between the White Desert and the Black Desert, inside the path of totality is planned around a verified totality viewing field rather than assuming that every White Desert landmark is inside totality.
For photographers, the key advantages of a controlled desert field can include open horizons, space between tripods, less urban obstruction, controlled capacity, nearby vehicles and logistics, shaded areas, cooling close to the observation zone, drinking water, power planning, local desert support, time to set up before the event and White Desert experiences as part of the wider itinerary.
Confirm the exact eclipse field and final facilities against the live operator plan before travel.
The White Desert formations themselves should not be casually advertised as the totality site without coordinate verification.
Tripod Etiquette at a Shared Eclipse Field
A photographer can ruin another guest’s experience without realizing it.
Set up in the designated photography area if one exists.
Keep tripod legs compact and visible. Do not place bags where people will trip during darkness. Avoid bright white lights near totality. Disable unnecessary camera beeps. Turn down or cover bright rear screens. Do not stand in front of another photographer’s long lens at C2.
If you use a tracker, leave enough space for its movement.
Discuss your plan with neighboring photographers early, not 30 seconds before totality.
Practice on the Sun Weeks Before the Eclipse
This is the most valuable technical preparation.
With the proper front solar filter installed, photograph the normal Sun.
Practice mounting the filter, finding the Sun quickly, high-angle tripod positioning, manual focus, exposure testing, bracketing, interval shooting, removing and replacing the filter without changing focus, checking histogram without overthinking and re-centering the Sun.
Record the settings that work.
Repeat the session until the process feels boring.
Boring is good.
You want muscle memory on eclipse day.
Practice the Totality Exposure Sequence on the Full Moon
You cannot reproduce the corona before the eclipse, but the full Moon can be a useful brightness and handling practice target.
The AAS notes that the full Moon is roughly comparable in brightness to the inner corona.
Use it to rehearse long-lens focusing, manual exposure, shutter-speed changes, bracketing, tripod stability and intervalometer control.
Do not treat a Moon exposure as a guaranteed corona exposure. It is a rehearsal tool.
Create an Eclipse-Day Camera Checklist
The night before:
- charge all batteries;
- clear and format cards;
- clean lenses;
- inspect the solar filter;
- confirm the filter mount;
- pack the cable release;
- pack tape and small tools;
- check local C1, C2, C3 and C4 times;
- confirm viewing-field transport;
- prepare water, clothing and sun protection;
- disable camera settings you do not need;
- synchronize camera clocks if using multiple bodies.
On site:
- build the tripod;
- attach the filtered camera;
- frame the Sun;
- focus manually;
- verify exposure;
- secure focus and zoom;
- test bracketing;
- confirm card space;
- confirm battery;
- locate shade and cooling;
- rehearse filter movement one final time;
- stop changing things unless something is genuinely wrong.
What Not to Do the Morning of the Eclipse
Do not update camera firmware, install an unfamiliar app, change to a new lens you have not tested, build a solar filter for the first time, learn a tracker from the manual, rely on autofocus without testing, depend on one memory card, depend on one battery, wait until C1 to set up, leave the camera unfiltered while aiming, assume the crowd will tell you when totality begins or spend the entire event reviewing images on the rear screen.
The most reliable eclipse rig is the one you already rehearsed.
Should You Use Auto Exposure?
Auto exposure can work for some scenes, especially wide-angle environmental video or smartphone capture.
For a close-up telephoto sequence, manual exposure usually gives you more predictable control.
Totality changes brightness rapidly and the dark lunar disk can confuse metering.
AAS photography guidance favors preselecting ISO and aperture and varying shutter speed deliberately.
If you decide to use aperture priority or another semi-automatic mode, test it extensively and understand how your camera meters a small bright corona against a dark frame.
Do not choose automatic exposure simply because manual mode sounds difficult. Choose the mode you can predict.
Should You Use Auto ISO?
For a carefully controlled corona bracket, generally avoid letting Auto ISO make hidden decisions.
Set your ISO intentionally, then vary shutter speed.
This makes the exposure sequence easier to understand and later combine.
For an unattended wide-angle second camera, auto ISO may be acceptable if your tests show predictable results.
The main camera and the documentary camera do not need the same strategy.
Image Stabilization: On or Off?
There is no universal rule across every lens and camera.
Some modern stabilization systems work well on tripods; some older systems can introduce movement when the camera is locked down.
Follow the manufacturer’s guidance for your specific lens and body, then test it.
If you use a tracker, stabilization behavior may differ again.
The correct eclipse answer is not a slogan. It is the setting proven by your rehearsal.
Mechanical vs Electronic Shutter
An electronic shutter can reduce vibration and allow high burst rates, but some cameras have rolling-shutter limitations or restrictions on RAW depth and bracketing.
Mechanical shutters are familiar and reliable but create physical movement.
Again, test your exact camera.
For the short exposures used around contacts, vibration may matter with very long focal lengths. For longer corona exposures, tripod stability and tracking can matter more.
Use the mode whose behavior you already know.
Post-Processing: What Happens After the Eclipse
Do not judge your final result from the camera screen in the desert.
Back up your files first.
A basic workflow may include:
- Copy files to two separate storage locations.
- Keep original RAW files untouched.
- Identify sharp frames.
- Group images by phase and exposure.
- Correct basic white balance and lens issues.
- Align totality frames if creating a corona composite.
- Blend exposures carefully if making an HDR-style corona.
- Avoid inventing detail that was not captured.
- Preserve a few single-exposure frames as documentary records.
- Record your location, lens, settings and contact times.
A composite is not inherently deceptive when it is clearly described as a composite.
Good eclipse processing often requires multiple exposures because the human eye perceives the corona across a wider brightness range than one camera exposure can capture.
Common Solar Eclipse Photography Mistakes
Mistake 1: Using the Wrong Filter
A dark filter is not automatically a solar filter.
Mistake 2: Putting the Filter in the Wrong Place
The filter belongs over the front aperture.
Mistake 3: Removing the Filter Too Early
Partial sunlight remains dangerous and extremely bright.
Mistake 4: Forgetting to Remove the Filter During Totality
The corona is faint enough that a partial-phase solar filter can make the totality image black.
Mistake 5: Forgetting to Replace It at C3
Bright photosphere returns quickly.
Mistake 6: Trusting One “Perfect” Setting From the Internet
Test your own filter and camera.
Mistake 7: Using Too Much Focal Length
A very tight frame can crop the corona and make tracking difficult.
Mistake 8: Depending on Autofocus
Manual pre-focus is more predictable.
Mistake 9: Ignoring the Sun’s High Altitude in Egypt
Your tripod may become awkward near zenith.
Mistake 10: Practicing Only Camera Settings, Not the Physical Filter Sequence
Filter handling is part of the exposure workflow.
Mistake 11: Ignoring Heat
A photographer can become unwell while concentrating on gear.
Mistake 12: Photographing Every Second of Totality
Leave time to look at the real eclipse.
A Minimalist Setup for a First-Time Eclipse Photographer
If this is your first total eclipse, consider keeping the kit small:
- one camera you already know;
- one telephoto zoom;
- one sturdy tripod;
- one safe, secure front solar filter;
- one remote release;
- spare batteries;
- spare memory;
- eclipse glasses for your own eyes;
- phone on a simple tripod for reaction video.
Your goal is not to reproduce a professional observatory.
Your goal is to return with a few strong images and remember what totality looked like.
A More Advanced Two-Camera Setup
An experienced photographer might use:
Camera 1: 400–600mm on a tripod or tracker for close-up corona brackets.
Camera 2: 14–35mm on a fixed tripod for the landscape, group and sky.
Optional extras can include an automated interval sequence, dedicated video camera, external audio, tracking mount or remote control.
Every added device creates another failure point, charging requirement and distraction.
Only add equipment when it solves a specific photographic problem.
Flying to Egypt With Eclipse Photography Gear
Keep critical camera equipment in carry-on baggage where airline rules allow.
Do not assume checked baggage will arrive on the same flight as you.
Prioritize the camera body, key lens, solar filter, batteries according to airline battery rules, memory cards, remote release and essential adapters.
Tripods may need separate handling depending on size and airline policy.
Check current airline rules close to travel because lithium-battery restrictions and cabin-baggage allowances can change.
Arrive in Egypt several days before the eclipse if possible. A delayed flight should not be able to destroy a trip planned years in advance.
Weather, Clouds and Photography
No eclipse site can guarantee a clear sky.
Historical climatology can help you choose a region, but it is not a forecast.
One reason Egypt’s Western Desert is attractive is its very low historical August cloud occurrence in parts of the path. That advantage is valuable for photographers because even thin cloud can reduce contrast and alter exposure.
However, clear desert skies can still include dust, haze or wind.
A serious photography plan combines favorable climatology with operational flexibility and conservative expectations.
Our expanded comparison series will also examine the best places in Egypt for the 2027 eclipse and why the Western Desert’s historical cloud pattern deserves attention.
Frequently Asked Questions
What is the best camera for the 2027 solar eclipse?
A DSLR or mirrorless camera with manual exposure control and a telephoto lens is ideal for close-ups, but the best camera is one you know how to operate. A smartphone can still record excellent wide scenes, video and reactions.
What lens is best for the 2027 eclipse?
For a close-up of the Sun and corona, roughly 300–600mm is a practical range for many photographers. Wider lenses are better for environmental images. Longer lenses can work but demand more careful tracking and framing.
Do I need a solar filter on my camera?
Yes during every partial phase. Use a proper front-mounted solar filter designed for optics. During true totality inside the path of totality, remove the camera solar filter to photograph the corona, then replace it as the bright photosphere returns.
Can I use an ND filter?
Do not assume an ordinary photographic ND filter is safe for solar imaging. Use a purpose-made solar filter from a knowledgeable supplier.
Can I use eclipse glasses as a camera filter?
Eye viewers and optical solar filters are not interchangeable by default. Use a filter designed and mounted safely for the camera lens.
Can I photograph the eclipse through a telescope?
Yes, but telescope imaging is a specialized technique. If you are not already experienced with safe solar telescope use, the eclipse is a poor time to learn. Solar filters must be correctly installed over the front aperture.
What settings should I use for the partial eclipse?
AAS guidance suggests testing the filtered Sun well before the event. A practical starting test can be ISO 100–200, around f/8 and short shutter speeds roughly between 1/500 and 1/4000 second. Your actual filter and camera determine the final setting.
What settings should I use during totality?
There is no single setting. Fix an ISO and aperture you have tested, then bracket shutter speeds from very short exposures for prominences and inner corona to longer exposures for the faint outer corona.
Should I shoot RAW?
Yes if your camera supports it and you understand the workflow. RAW preserves more tonal information for high-dynamic-range corona processing.
Do I need a tripod?
A tripod is strongly recommended for telephoto work and longer totality exposures.
Do I need a star tracker?
No. A tracker can help experienced users, but it is optional. A normal tripod is easier for many photographers.
Can I autofocus on the Sun?
You can test autofocus, but manual pre-focus is more reliable for a critical sequence. Focus through the proper solar filter on the solar limb or sunspots, then secure the focus.
Can I photograph the eclipse with my phone?
Yes. A phone is particularly useful for wide-angle video and group reactions. Use appropriate solar filtration whenever pointing the camera at the partial Sun.
Is the White Desert itself the eclipse photography field?
Not automatically. The famous White Desert formations should not be assumed to lie inside totality. The product uses a separate viewing area in confirmed Western Desert eclipse-camp region between the White Desert and the Black Desert, inside the path of totality near Bahariya, with White Desert experiences included in the wider journey.
Will the Sun be low enough to photograph with a pyramid or temple?
Do not assume so. Around the strongest part of the path in Egypt, the Sun is very high near midday. A landmark composition requires exact geometry, legal access and a specific viewpoint. Iconic-background claims should be checked rather than invented.
Is Luxor good for eclipse photography?
Luxor has exceptionally long totality and established tourism infrastructure. It is a strong option. Photographers who prioritize controlled capacity, desert horizon, Cairo access and a dedicated field can also compare the managed Western Desert option.
How early should I set up?
Arrive with a large safety margin. At a minimum, you should have enough time to assemble, focus, test exposure and recover from the heat before the partial phase becomes important.
Should I photograph every phase?
Only if it serves your goal. The partial phases last much longer than totality, so you can capture selected intervals rather than shooting continuously.
How can I make sure I do not miss totality?
Practice. Simplify the gear. Pre-program what you can. Know C2 and C3. Use a reliable timing alert. And deliberately reserve time to stop touching the camera.
Final Photography Plan for August 2, 2027
The best eclipse photography plan is not the one with the most equipment.
It is the one you can execute safely under pressure.
Before traveling to Egypt:
- Choose the image you actually want.
- Select a camera and lens you already understand.
- Buy a proper front solar filter early.
- Practice on the normal Sun.
- Test high-angle tripod positioning.
- Establish manual focus.
- Determine filtered partial-phase exposure.
- Design a totality bracket.
- Rehearse C2 filter removal.
- Rehearse C3 filter replacement.
- Prepare battery and storage redundancy.
- Build heat and hydration breaks into the schedule.
- Confirm exact local eclipse contact times.
- Leave deliberate time during totality to look up.
The 2027 total solar eclipse in Egypt offers something photographers rarely receive: time.
Use that time intelligently.
Do not turn six extraordinary minutes into six minutes of camera menus.
For the full event context, read the 2027 Total Solar Eclipse in Egypt guide. For a controlled desert setup, explore the confirmed Western Desert eclipse-camp region between the White Desert and the Black Desert, inside the path of totality, compare the eclipse tour packages and check availability.
Sources
The technical and safety framework in this guide should be rechecked shortly before the event because official guidance and equipment recommendations can change. Core references include:
- American Astronomical Society: How to Shoot Solar-Eclipse Images & Videos
- American Astronomical Society: Solar Filters for Optics
- American Astronomical Society: How to View a Solar Eclipse Safely
- American Astronomical Society: Suppliers of Safe Solar Viewers & Filters
- NASA: Eclipse Viewing Safety
Exact camera settings remain equipment-dependent. Exact C1, C2, C3 and C4 times must be calculated for the final observation coordinates.